Intro
I wanted to add reply-by-email subscriptions and notifications to mix-space, so I decided to set up my own mail server.
After looking around, iRedMail seemed powerful, easy to use, and not too complicated to deploy. Let's do it!
If you want to deploy it yourself, you'll need:
- A VPS, preferably with Reverse DNS support.
- A domain name (of course)
This post is based on Ubuntu 22.04 LTS and uses the domain xxu.do as an example.
Installation
Preparing the System and Installing
- Update your packages and install the required ones:
sudo apt update
sudo apt upgrade
sudo apt install wget curl sudo tar socat bind9-utils -y
- Set mail.xxu.do as the mail domain by configuring the VPS hostname:
- Download and install iRedMail:
You'll now enter the graphical installer. Use Space to select, Enter to confirm the next step, and press Ctrl+C to stop the installation at any time.
Configuring DNS Records
- Point the mail domain to your VPS, then request and install a certificate:
- Disable iRedMail's greylisting (I'm not sure what effect it has; I just followed the tutorial):
Set up PTR reverse DNS: go to your VPS control panel, set the PTR record to the mail domain (mail.xxu.do here), and verify with
nslookup x.x.x.x(your server IP).Add the DNS records:
vi /root/iRedMail-1.6.8/iRedMail.tips
# Find the part similar to the one below, copy it, remove all quotes and spaces, and concatenate it into one continuous string.
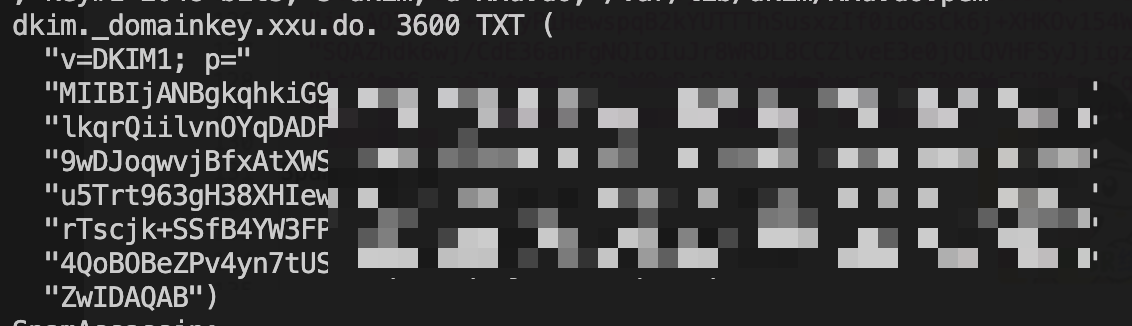
You should get something like the code below. Paste it into the Content field of the dkim._domainkey record:
| Type | Name | Content |
|---|---|---|
| MX | xxu.do | mail.xxu.do |
| TXT | xxu.do | v=spf1 mx ~all |
| TXT | dkim._domainkey | See above, e.g. v=DKIM1;p=XXXXXXXXXXXXXXXXXXXXXXXXXXXXX |
| TXT | _dmarc | v=DMARC1; p=none; pct=100; rua=mailto:dmarc@xxu.do |
Configuring iRedMail
You can now visit the following pages:
To add users, log in to the mail server admin panel and add them where shown below.
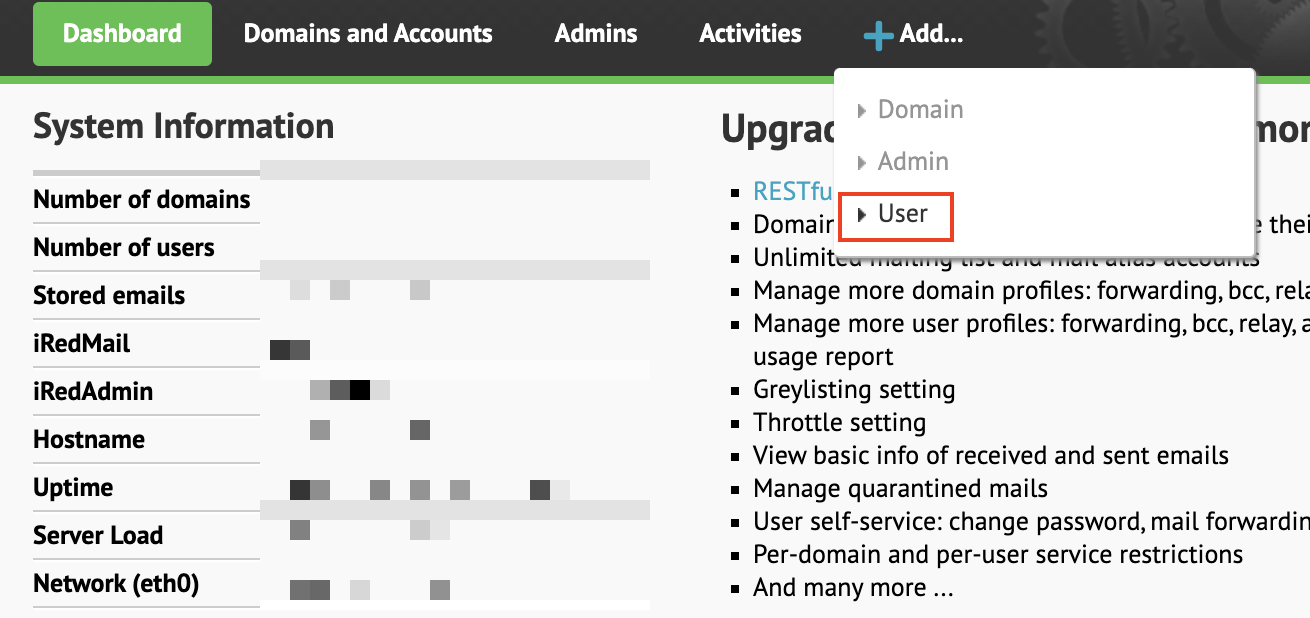
Add user
Testing the Mail Server
mail-tester
- Go to https://www.mail-tester.com and get a test email address.
- Log in to the mailbox with the admin account (postmaster@xxu.do), pick any of the three emails the system sent, and send it to the test email address.
- Go back to https://www.mail-tester.com and click Test.
Unsurprisingly, it got a perfect 10/10.
Gmail Test
I tried sending an email to my Gmail account, but it went to Spam. After manually marking it as not spam, subsequent emails I sent to others were delivered normally.
Email Client Support
| Protocol | Address | Port & Secure Port |
|---|---|---|
| IMAP | xxu.do | 143,993 |
| POP3 | xxu.do | 110,995 |
| SMTP | xxu.do | 25 (must be open), 587 |
Outro
After installing iRedMail, I couldn't deploy any other services. After troubleshooting, I found that nftables was probably installed by default. I edited the rules in vi etc/nftables.conf, restarted the service with systemctl restart nftables, and it was fine.